
Photographs taken 2012 to 2013
See also
Modifications: 2
(outboard bracket & trim tabs), or go back to the
Adele main page,
or
Making a New
Wooden Navigation Mast (a photo guide to making your own mast),
or Adele 2021 as
she was when we sold her.
The plumbing has also had a bit of a make-over. From the ground up in fact - or at least from the bilges up. The inside of a boat always looks better for a lick of paint in the lockers, and it kind of makes you feel that you've taken ownership of the boat, and given a proper spring clean. For inside all the boat lockers, we chose grey Danboline paint. This made a big difference to the look and tidiness of the lockers, both in the cockpit, and in the cabin. It also has good chemical resistance to water and nasties, and is well suited to the lockers on a Hardy, where, let’s face it, we keep all sorts in ‘em! This then readied our port aft locker for an auxiliary fuel tank, and the forward triangular cabin locker for a new freshwater tank.
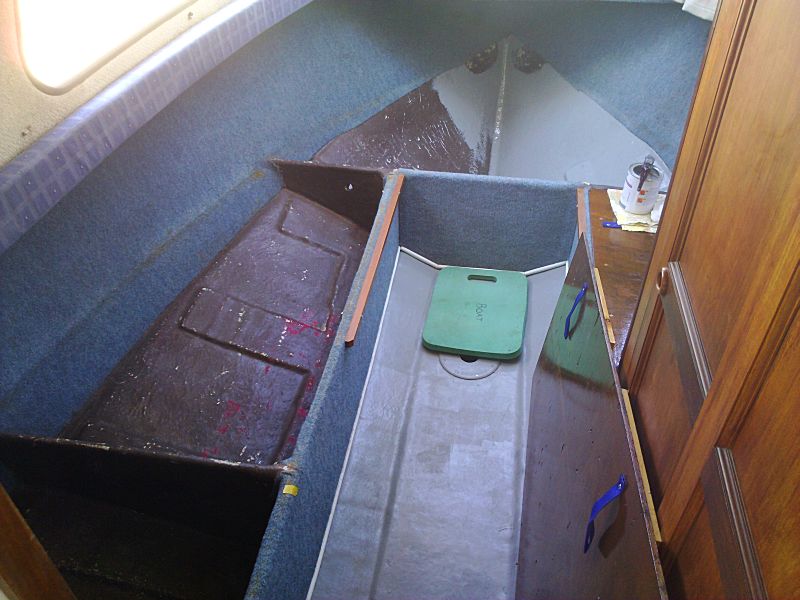
Grey Danboline paint was used inside all the lockers, in both cabin
and cockpit
The freshwater tank was near the top of the want list, but with Plastimo going down the pan at the time, their very handy size triangular 120 litre flexible freshwater tank was suddenly hard to find. This is the perfect water tank to fit to a Family Pilot, and is thankfully readily available again now. One hundred and twenty litres of water adds a good “person’s-worth” of weight of ballast forward. This can help keep the bow down a bit, with healthy amounts of ballast lurking aft, by way of engines, batteries, fuel tanks and the inevitable crew (sorry crew!). Wooden blocks were epoxied into place to use for tank tie-points, and also for additional locker lid support when lifting for access. We also fitted a deck-fill pipe to the port side at the forward end of the cabin coach-roof, and hid this by wrapping round a spare off-cut of the new cabin carpet. The feed pipe to the galley was led through the bottom of the port-side lockers then up to a standard Whale tap unit.
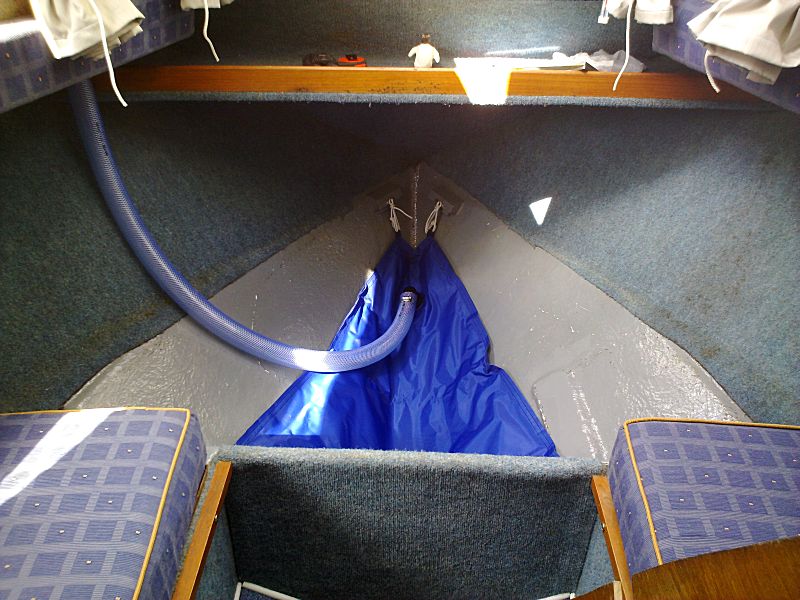
Installing the new 120 litre freshwater tank
Fitting a Sea Toilet
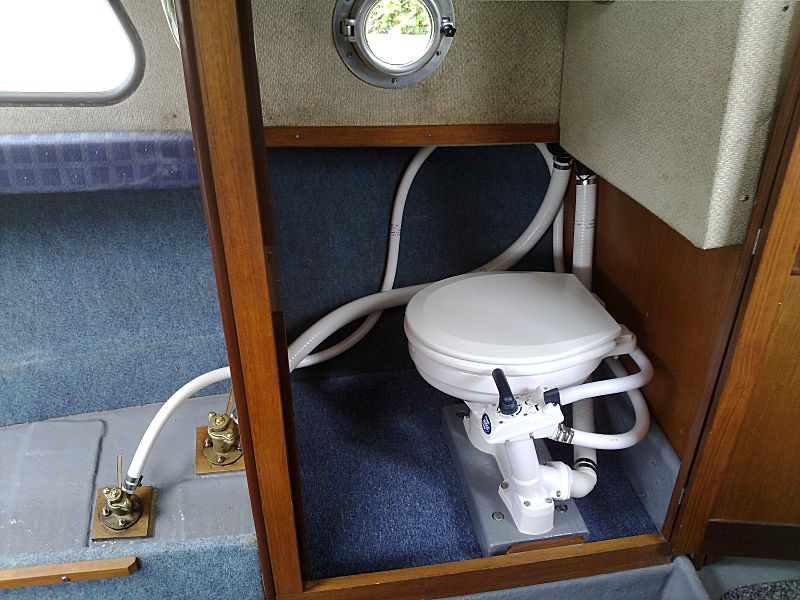
When it came to plumbing, one of the major jobs that we did that first season was to fit a new sea toilet. Oh wasn't that just a bundle of fun!!! Or as I put it on the Hardy Forum, how does one fit one’s heads in, so that one’s tails fit comfortably?!!
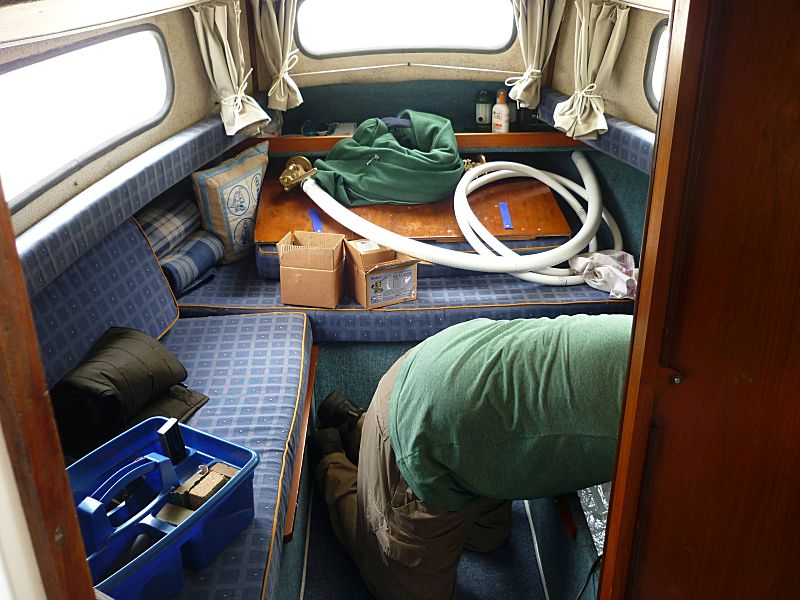
Oh the Joys of fitting a sea toilet!
We fitted a Jabsco Regular size sea toilet in the heads compartment, and fitted the obligatory (or I think so) Blake’s Seacocks under the starboard cabin locker. Sorting out the geography of the whole affair was certainly an interesting exercise! We had to decide whether to sit athwart-ships with a “legs-out-the-door” kind of modus operandi, or to sit fore and aft, either fore-first, or aft-first! So the “sitting trials” began as the only way forward... As it happened, the best way was to face forwards with the toilet fore and aft, which also retained the First Mate’s Modesty with the door opening the right way and not facing “downhill”, and also allowed the pipes and heady mechanics of the thing to fit neatly under the helm controls and electrics back panel. This also (without getting too delicate about it), maintained acceptable knee-room and manoeuvrability, and moderate headroom (sorry!), yet not getting stuck leaning forward too much! It also gives a nice view out the porthole! One can only assume passing boats must know where you are, when they see a head peering out!
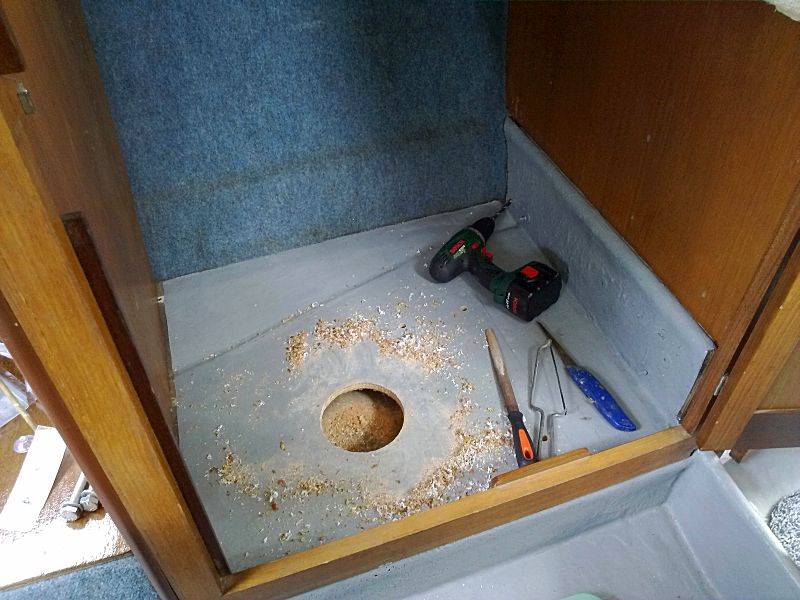
Fitting the toilet – an access hole and inspection hatch is needed
for bolting down the toilet
In order to fix the toilet into place, and given the fact that it was going down onto an approximate 3/4" thickness of glassed ply, simply screwing it down to this was not an option - bolting was needed for a more secure fixture. However, the overall height of the toilet was a little low, so a decent 3” thick chunk of wood was used to raise the whole performance to a more acceptable height, which also enabled a better securing of the whole. The block was bolted into place by cutting an access hole in the ply, and then installing an inspection hatch similar to the one in the aft of the cockpit. The toilet was then screwed down directly into pre-drilled holes in the thick block using heavy duty hex-head screws.

The bolted down 3" wooden block base for the sea toilet - with
access through the inspection hatch
The compartment was finally carpeted in the same hard-wearing carpet as was fitted in the cabin sole. In terms of the plumbing, as the installation is close to the waterline, an anti-syphon loop and valve were fitted to the outlet for safety, but as the height of the toilet rim is about 8" above waterline as taken from the slight turn in the hull/boot-top line, just a loop (no valve) was fitted to the inlet pipe. Apart from the valve on the seacock, there is also the inlet valve on the toilet.
The result was tidy yet compact; a novel experience yet functional!
For the seacocks themselves, and after good advice received from Simon Kidd who had done the original survey for us, these were sighted between the wooden stiffeners in the hull to avoid any possibility of water and rot getting in to the stiffeners. As I am somewhat taken to Victorian levels of construction technique, I did choose to use separate glassed and epoxied-in marine ply spacers with the seacocks, though this is not absolutely necessary, and should be carefully sealed.
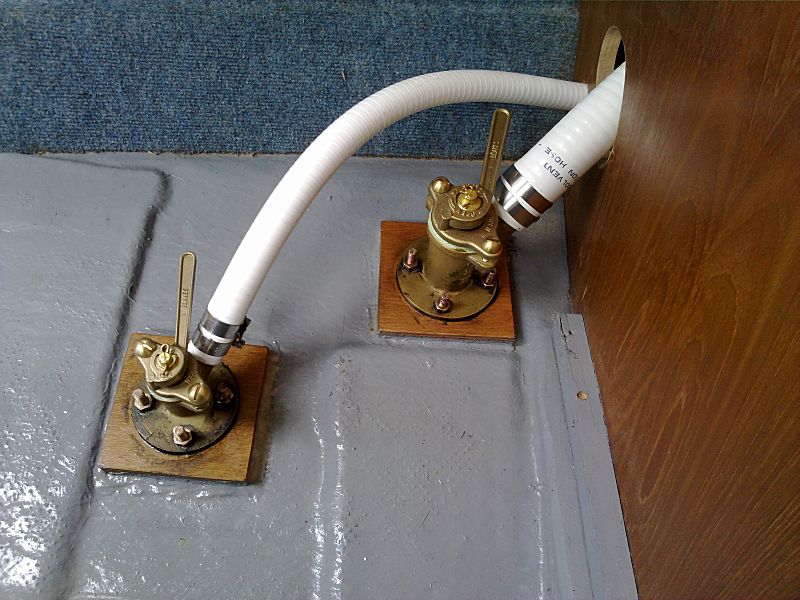
The outlet and inlet pipes connected to the Blakes seacocks - they
really are the only ones to use
It is important to use the correct odour-free sanitation hose, although this can be a real pig to fit onto the Blake's seacocks. I thankfully tried this first, and am I glad that I did! Heating with a hot-air gun proved to be the only really effective and curse-free way to do it (search the forums on YBW and you will see my point!) and doesn't strain the nice neat seacock installation you have just made. The whole set-up, at least so far, has needed very little care and maintenance, has been pretty well pong-free (provided you flush and pump well on last use before leaving), and it remains a quaint delight to use! In fact we are quite attached to the little affair. It may not be a spacious luxury en-suite, and may look from the outside a little more like a wardrobe, but we like it. We call it Narnia.
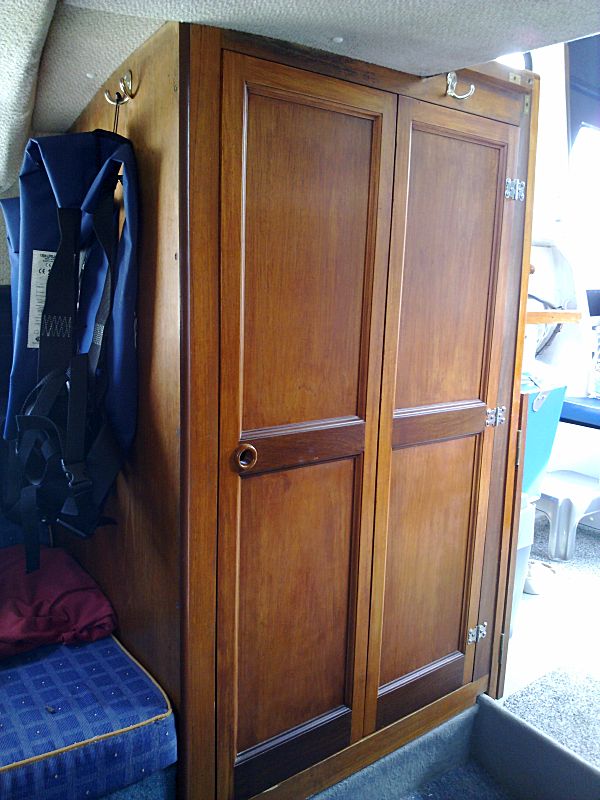
Narnia
Battery Management
Onboard conveniences sorted, come the Spring of 2014, we were ready to do something about the batteries. Well, battery, as it happens. Which was exactly the trouble – there was only one. So another bucket-load of research took place, and we eventually settled for installing a second larger leisure battery (105Ah) to complement the existing starter battery, together with a battery management set-up using the Blue Sea “Add- a-Battery” system.
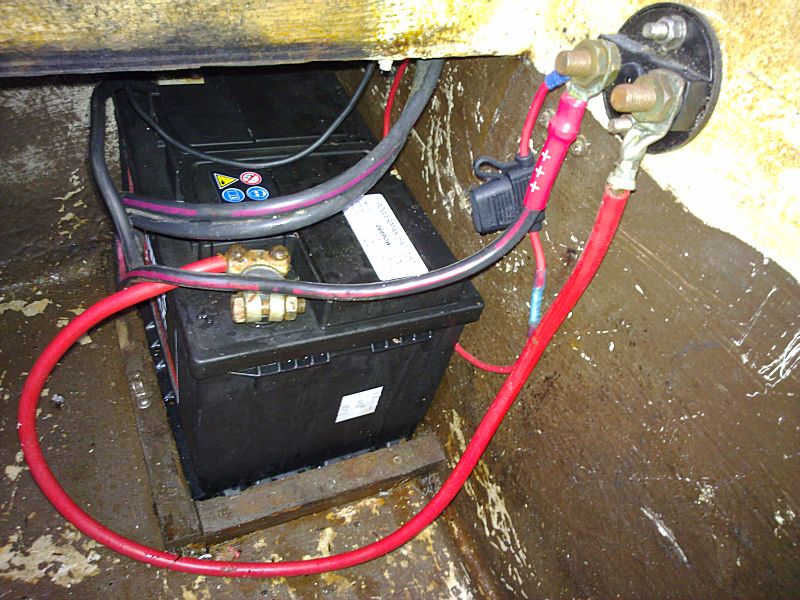
The original single battery set-up on Adele
This entailed some more delightfully fun work. Now, I’m used to crimping those nice handy size, red and blue and yellow electrical crimp connections, but blimmin’ great battery-size cable connections are quite another thing. And being able to buy all the cables, exactly the right length and with exactly the right terminals on each end, just wasn’t going to happen. So. More research. And in the end, courtesy of eBay, a nice neat £23 tool solution to do it with. This is a percussion punch where the crimp terminal is placed between jaws and a heavy centre punch is hit severely, several times, with a hammer to form the crimp joint. Do not solder these connections, as the solder joint alone will be weak, and will be liable to fatigue failure in future life. Some nice lengths of battery cable and terminals from a Marine Engineer in Looe, and I was away making up trial connections. Experimenting first is an absolute must to ensure that you have a safe and mechanically sound crimp connection of this type. Simply make one up, and then saw directly in half across the crimp to ensure the cross-section of wires in the terminal are completely compressed, and will not fail. Then to work.
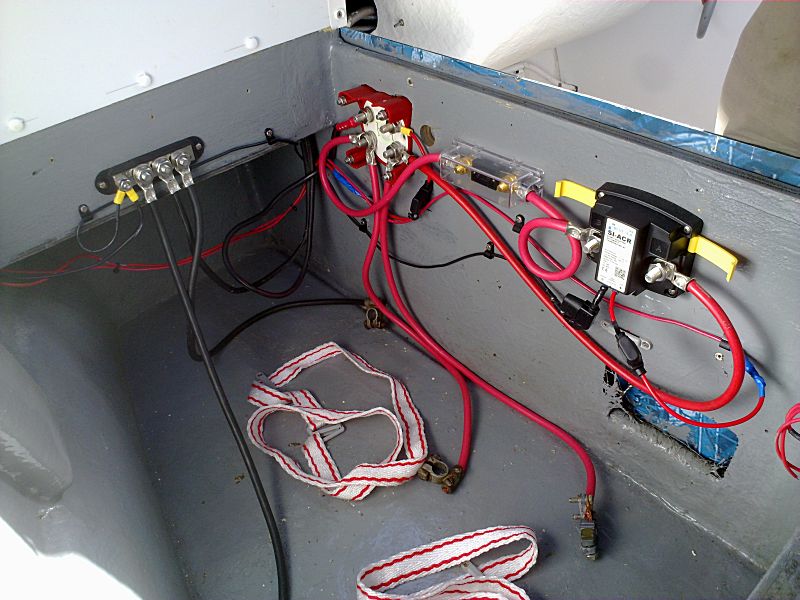
The wiring for an Add-a-Battery system may look complicated, but is
reasonably straight-forward
The Add-a-Battery system is ideal, packaged for a marine environment, and it allows for both batteries to be charged by the engine simultaneously, yet allowing the batteries to be used independently for starting or leisure use. It is based on an ACR Automatic Charging Relay set-up; the starter battery will always be left charged and available, even if the leisure battery has been drained down to gasping levels by the cool-box, lights and other needs. It can also isolate sensitive electronics during engine starting, and can connect both batteries for starting in an emergency.
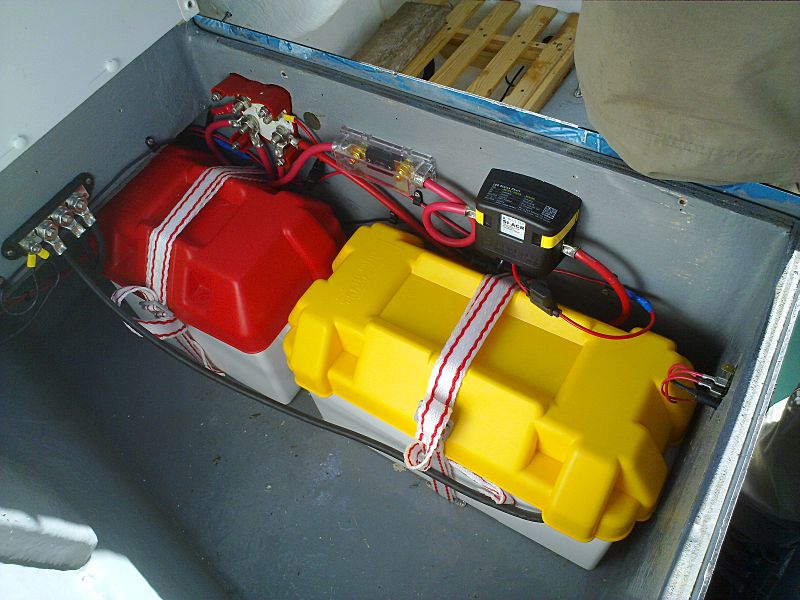
Battery Management can be quite self-contained in the starboard aft
cockpit locker
The cabling was relatively straight-forward. Connections were short, and the set-up on a Family Pilot can be quite self contained. Blue Sea say that fuses should be put in both positive battery lines to protect the wires from melting if there is a short. Over direct short lengths, this is neither necessary nor practical. I did however put a fuse in line with the Add-a-Battery unit itself, against the obscure chance that the unit itself failed and connected one full battery to the other (possibly also failed) flat battery. Never hurts to be on the safe side. Oh, and I carry a spare fuse of course.
The Wheelhouse Hatch
The old canvas wheelhouse hatch had been getting a bit grubby and was showing signs of mould inside, and we needed to get some better ventilation in the wheelhouse itself, and in the cockpit under the main canopy when Adele was left out on the mooring. Black mould was also starting to show itself in greater amounts inside the main canopy, and the ventilation was needed to let out the warm moist air that was able to gather in the top of both the canopy and the wheelhouse top. We did not want to fit a costly opening hatch, and would not have wanted to leave the hatch partly open while away in any case, as the weather and rain would get in. The solution for us was to fit a mushroom vent, and as the need for an opening hatch was no longer there, we decided to fit a simple fixed marine ply cover. The old canvas hatch was removed, and a 9mm ply board made up, securely screwed down and sealed in place, easily flexing to conform to the curved hatch rim.
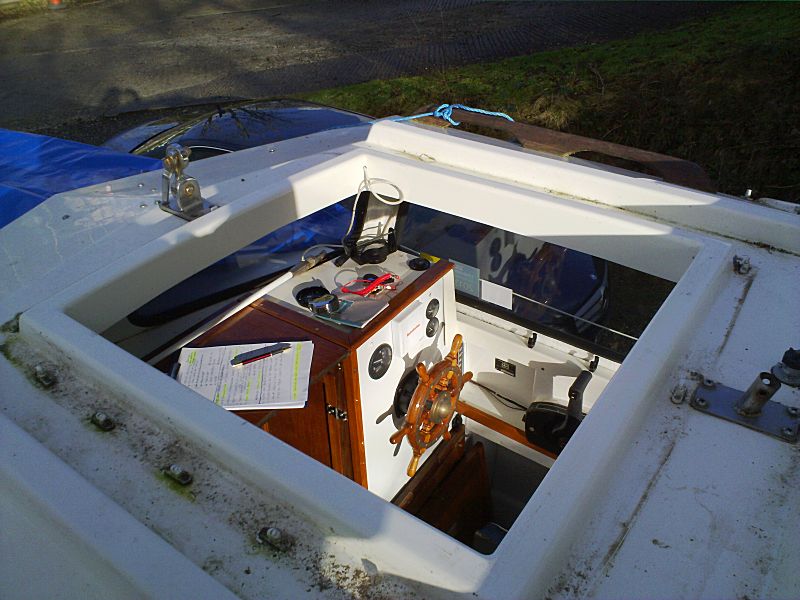
With the old canvas hatch cover removed, there is a good width of
hatch lip to work with
At the same time, we needed to move the mast (and navigation lights) position forward, to allow the fitting of a much needed "Gull-sweep" to deter the gulls that had a habit of spending time aboard while we were away. Not that the gulls themselves were the problem, it was everything that they insisted in leaving as calling cards. Anyhow, moving the mast forward, consequently meant that we also needed to move the radio aerial sideways out of the way, so the replacement wheelhouse hatch cover resulted in not only a new mushroom vent for helping to vent out warm moist air, but a new mast position, a new aerial position, and a new gull-sweep mounting (it's a rotating anti-gull windmill thing, and very effective!). As it has turned out, we still cannot lose enough warm moist air even with the vent open, and over a season, we still suffer from the canopy acquiring some black mould growth, that if not occasionally cleaned off in situ, could get out of hand. We still have yet to find a fully effective solution to this, other than to keep the canopy ventilated inside as often as possible, by going to the boat as often as possible. I find however, that such a solution is acceptable.
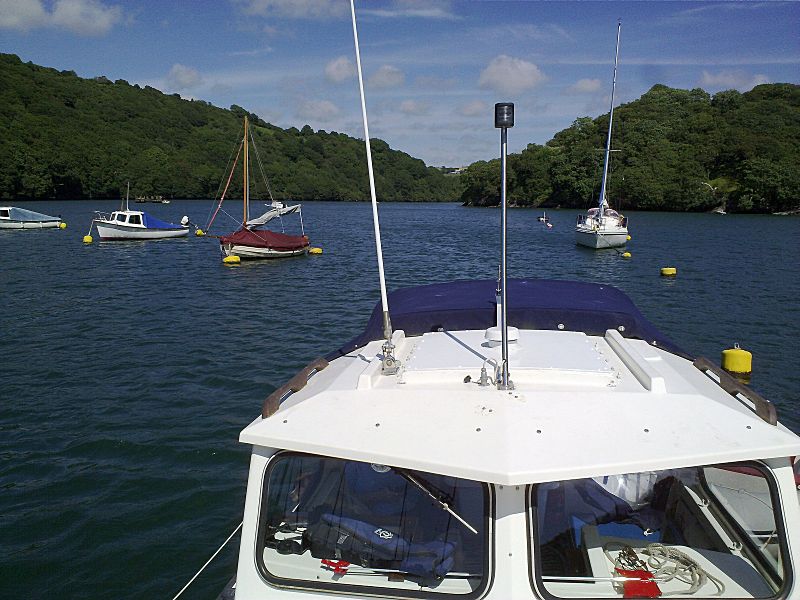
The new fixed "hatch" panel on Adele, with repositioned mast and
aerial, and new mushroom vent
Binocular Rack
A simple but very handy addition! Simply made out of a few pieces of marine ply off-cuts, this houses a set of binoculars within easy reach from the wheelhouse, and also mounts the Ship's Chronometer to the side. The photo below also shows the current galley storage, which may in future be modified to part enclose, or maybe gain some access from the cockpit.
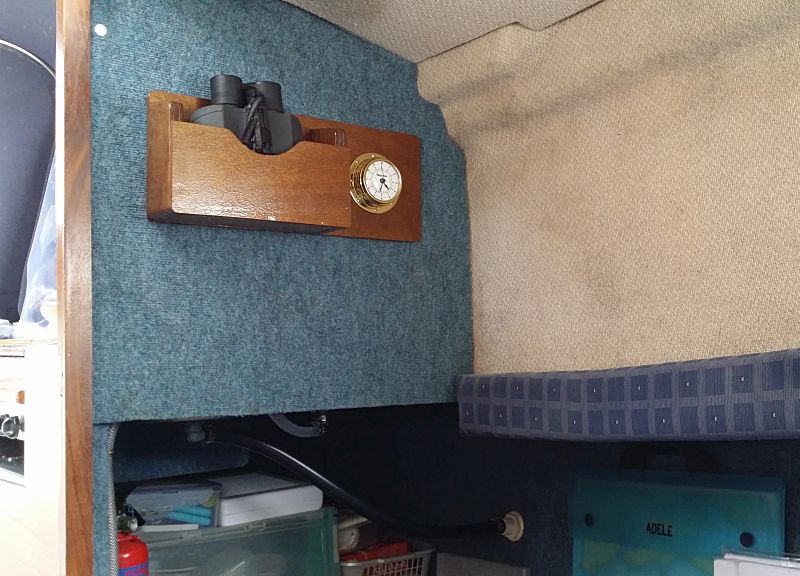
The new binocular rack and Ship's Chronometer
For further details of modifications carried
out to Hardy Family Pilot Adele,
see
Modifications: 2 (outboard
bracket & trim tabs), or
Making a New Wooden Navigation Mast
or
go back to the Adele main
page,
or Adele 2021 as
she was when we sold her.
See Adele out on the water on Motor Boating in Fowey
![]()
Connect with us, Like us and Follow us on Facebook!
PhotoFile Cornwall supports CoaST and Sustainable Tourism