
Photographs taken 2015
See also
Modifications (sea
toilet, battery management & hatch), or go back to the
Adele main page,
or
Making a New
Wooden Navigation Mast (a photo guide to making your own mast),
or Adele 2021 as
she was when we sold her.
The Outboard Bracket
One of the other items on the boat that we’ve had yet even more fun with, has been the outboard bracket. Simples!... you might think. “It’s just a bracket!” Not simples. It’s a minefield of trickery and complication!
The outboard bracket that came with the boat turned out to be a bit rickety. “No problem, we’ll get another one!” ...“and the same type of course that was on before, right?” Oops. We had to live with this new wrong one for the first season, but we did manage to get all the new height and position issues sorted out OK before we hung the new auxiliary outboard on it. Which was a bit heavy. Fine for the boat (we now have a 6HP Tohatsu bought new at a good price, so hopefully reliable when needed) but a bit heavy for the bracket spring, which pretended it wasn’t there. We sold it on eBay (next Spring!).
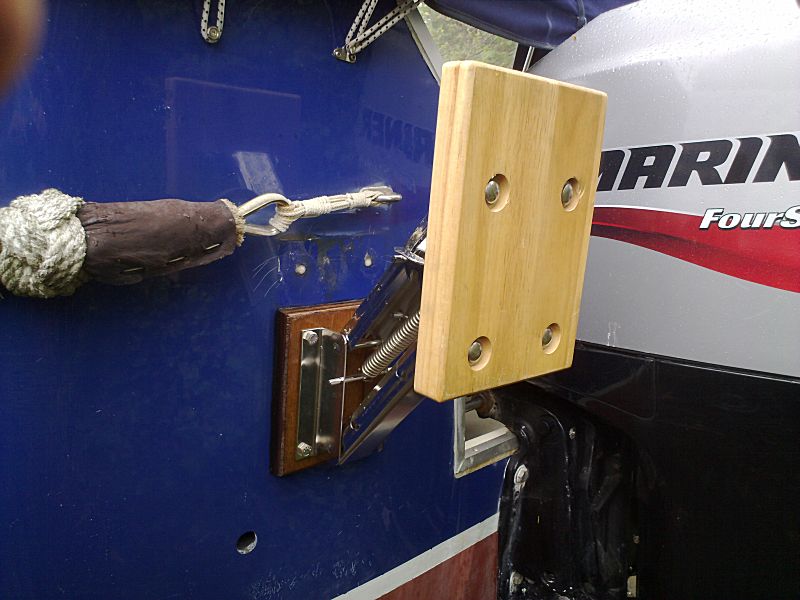
The new replacement outboard bracket - which was foolishly the same
type as the old rickety one!
A new (again!) stronger bracket with a decent release lever was bought. This one was nicely balanced. Back on to the boat, with all heights checked, and it all looked good. Um, no. With the different bracket style, the position of the outboard in the up position was different with respect to the boat gunwale, and the outboard would not tilt to its trolling position, which was all I needed for full water clearance. Unfortunately this was not checked on the boat itself until the new bracket was in position, and the auxiliary engine was brought to the boat to fit prior to launching. Oops. And for icing on the cake, the cylindrical outboard lock would no longer fit across the decent release lever! This meant buying a new outboard lock in the form of a secure motorcycle lock, on the basis that, well greased, if it was good for a whole motorcycle, then it was good for an outboard. We lived with the lack of tilt for the season. Nearly sold the bracket on eBay.
The new improved stronger version, with release lever, that is well
balanced for lowering
We didn’t sell it in the end as it was a good bracket, so I just had to move the vertical position of the bracket up to an old set of outboard bracket holes, that had previously been plugged with epoxy, so out came the drill and out came the epoxy plugs. At last the outboard would tilt to the trolling position just over the gunwale without deforming the canopy, and the new motorcycle lock continued to work fine. Depth of outboard still good. Height of tilted outboard good. Phew!
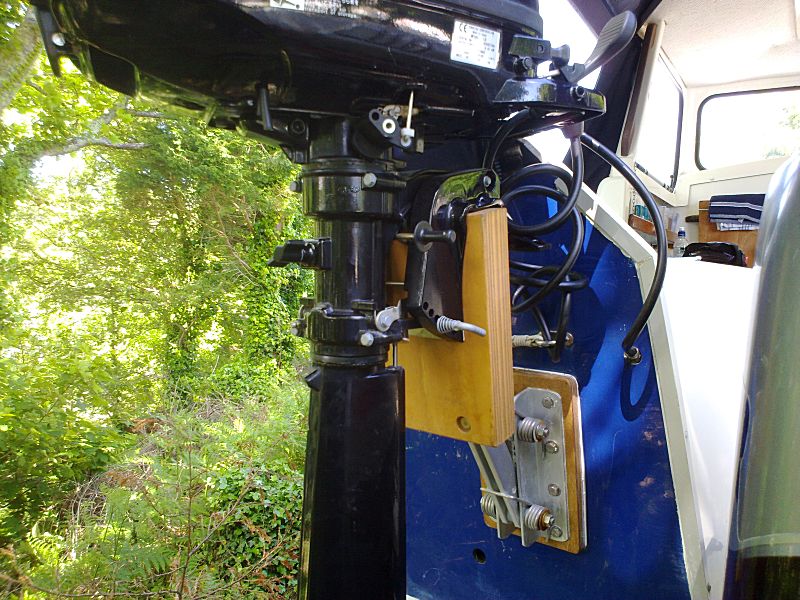
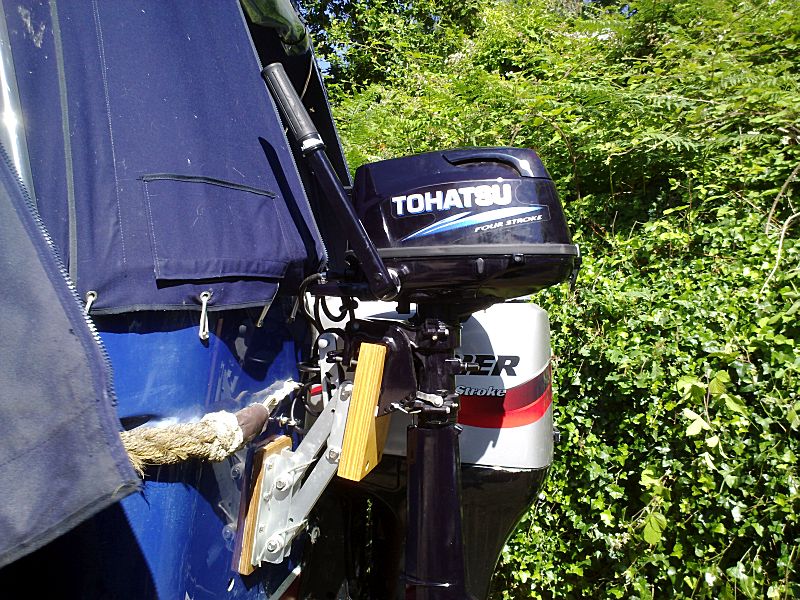
The new bracket repositioned higher to a better stowage position
Fitting Trim Tabs
Come the Spring of 2015, I at last came across a job that went entirely as planned, turned out well, and works! With all the talk of trim tabs, and with the reluctance of Adele to push easily towards planing, and even remaining quite bow high at displacement speed, we decided that it was time to fit them. Trim tabs would also give a more comfortable ride for crew, with the right attitude of the boat. So which ones to choose? Armed with the excellent Hardy Forum posting and photo from Peter Wales, plus the article by Simon Kidd in the Hardy Owner magazine, and much other reading, we finally opted for Lectrotabs rather than the Bennett's hydraulic tabs chosen by Peter and preferred by Simon.
The reasons that the Lectrotabs suited us, as opposed to going hydraulic, were down to the ease of fitting them (my job!), the space saved with no hydraulic unit (space being at a premium), a good all-in price deal at £732 (I especially liked that one!), and let's face it, I just liked ‘em! The tabs are also not permanently submerged for the whole year, and being well made plus good care and maintenance, I do not believe that there should be any undue issues with the "electrics near water" concern. In the end, choice will leave those with preferences both ways, and it will come down to specific needs of any given installation, and personal choice. I am certain both types will give good service if installed and maintained correctly. We eventually bought the Lectrotabs through the UK main agent A.S.A.P. Supplies who were very helpful.
The size of tabs that we ended up using, 18” width x 12” chord (“length” of a tab out from the boat), were the same size that Peter arrived at in his discussions with Bennett’s. This gave us a very warm feeling that we were doing the right thing, despite the tabs seemingly looking on the large side. However, they have work to do, and small tabs are going to have little or no effect on a significantly aft-heavy semi- displacement boat like the Family Pilot. Decision made.
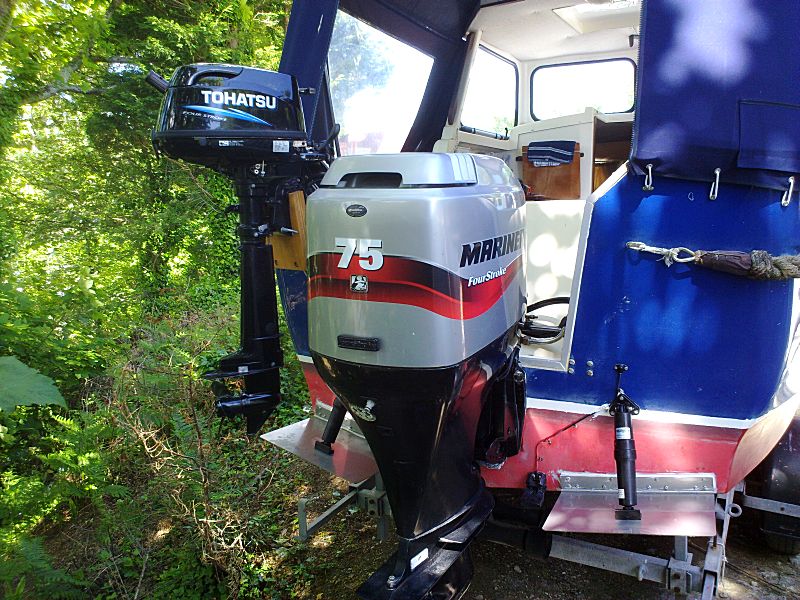
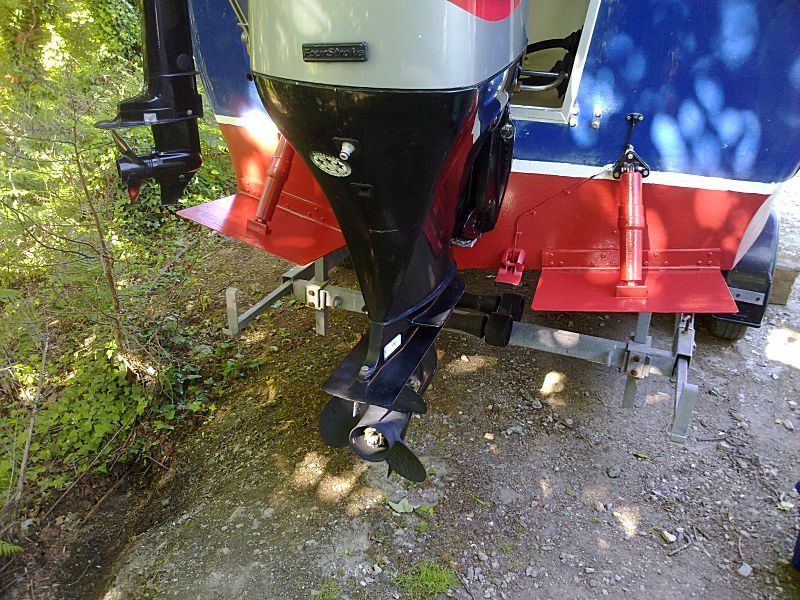
Main engine, Auxiliary engine, bracket position and trim tabs all in
place (prior to painting)
Fitting the tabs could not have gone more smoothly. There was an excellent guide that appeared in the very last issue of Motor Boats Monthly (October 2014) about fitting Lectrotabs, and I followed this virtually to the letter, alongside the Lectrotab instructions. If there is any trick to it, just ensure the tab hinges fit neatly to the transom curve, using a close-fitting filler piece or spacer, and secondly that the “up” or home position of the tabs is a fraction higher and a fraction over parallel to the lower hull form to ensure no spray is induced through the hinge slot (so it states).
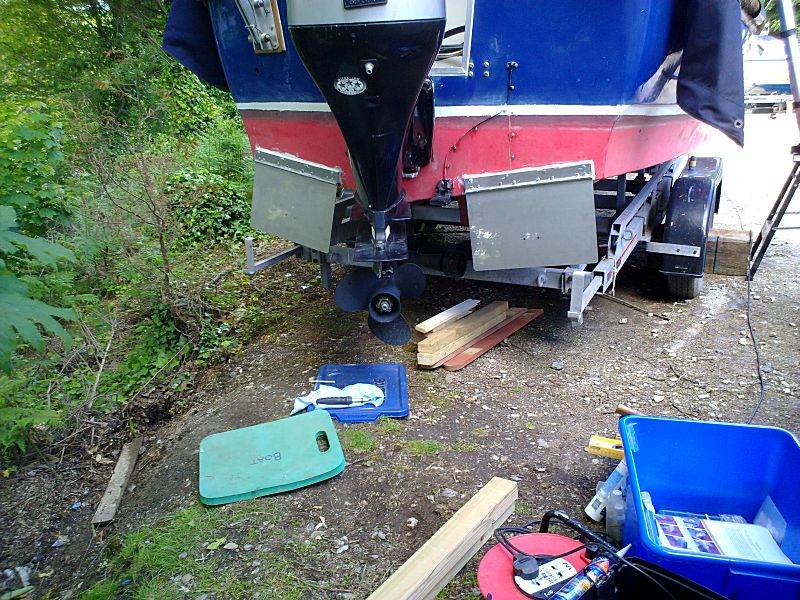
Achieving parallelity with the hull form is simply achieved using two lengths of timber wedged underneath the hull, extended beyond the stern, to hold the tab plates up. The plates and rams can then be positioned correctly on the transom before marking and drilling to fit them in place. If like me, you will no doubt find the fishfinder/sonar transducer is completely in the way, and this will need moving. The old holes were sealed up with Sikaflex 291i, prior to them being covered over by the new tab plate assembly. Ensure the lateral position of the tabs along the transom is correct, around 2" inboard, and of course not in any conflict with any outboard legs (don't forget the auxiliary!) with full helm applied.

Lining up the first trim tab using horizontal lengths of timber
wedged up against the hull for parallelity
The back of the transom is not flat. So to fit the plates, a filler piece or spacer of some form is required. To make this, I simply drew a curve on a piece of pine batten held up against the bottom of the hull on one side, then carefully cut this out and checked it against the transom for use as a template, and then used it to cut out the two hardwood spacers to use behind the plate hinges. You should find both sides of the transom are the same curve, just reversed! For our own spacers, I had some handy lengths of iroko in the workshop, which were just the right width and thickness. Make the spacers at least 1/4" thickness in the middle, and remember to cut the wood to use the concave sides! If you have no suitable hardwood, a good source of boat building timber (that can also be mail ordered) is Robbins Timber of Bristol. The finished spacers were then cut and drilled at home to match the tab plate hinges, ready for assembly.
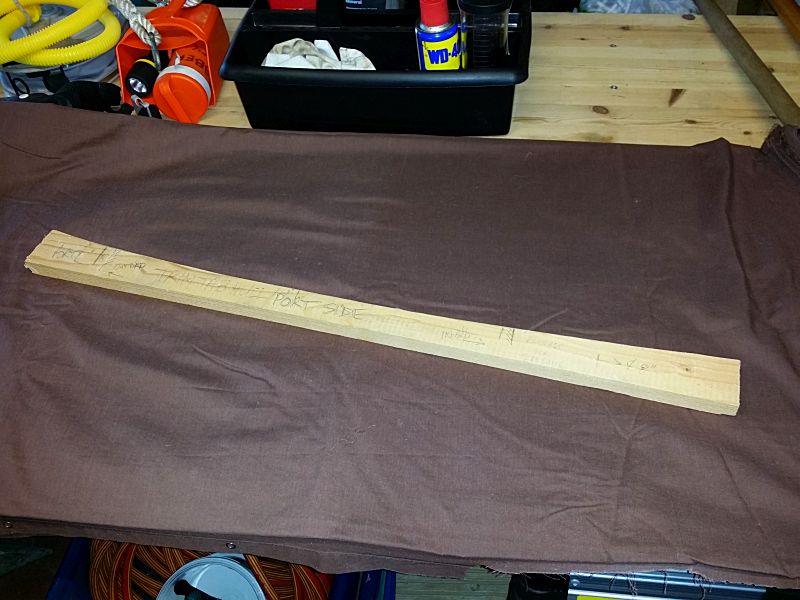
A pine batten was used to draw the transom hull curve, and cut out
as a template for making the spacers
(you should be able to just
flip over for the opposite side of the transom)
Using the lengths of timber wedged under the hull for support, you can then accurately position the plates for marking the screw hole positions on the hull. The holes were drilled slightly smaller than the stainless screws to be used (to avoid any damage to the gelcoat and ease of fit when assembled), and to a depth to ensure at least 3/4" screw depth. I used slightly longer screws for the outside plate holes, as the spacer thickness is greater here. The plates and spacers were then screwed securely to the transom using 12 stainless screws each side, and the whole assembly sealed tightly together using the Sikaflex 291i. Good coverage of the Sikaflex adhesive and sealant ensures sealing of all the holes drilled in the transom, and helps also to protect the wood filler pieces prior to priming and antifouling.
Both tab plates fixed in position, using the hardwood spacers
I now had trim tabs on Adele! Just not fully functioning yet. The timber supports wedged under the boat then came back into play to enable correct positioning of the rams. Ensure the rams are fully retracted, and first fix the rams to the plates. Follow the instructions supplied to mark the holes and fix the rams to the transom at the correct height, with the control cable fed through the hull for routing to the wheelhouse. Barring painting and the electrics, your trim tabs are installed!
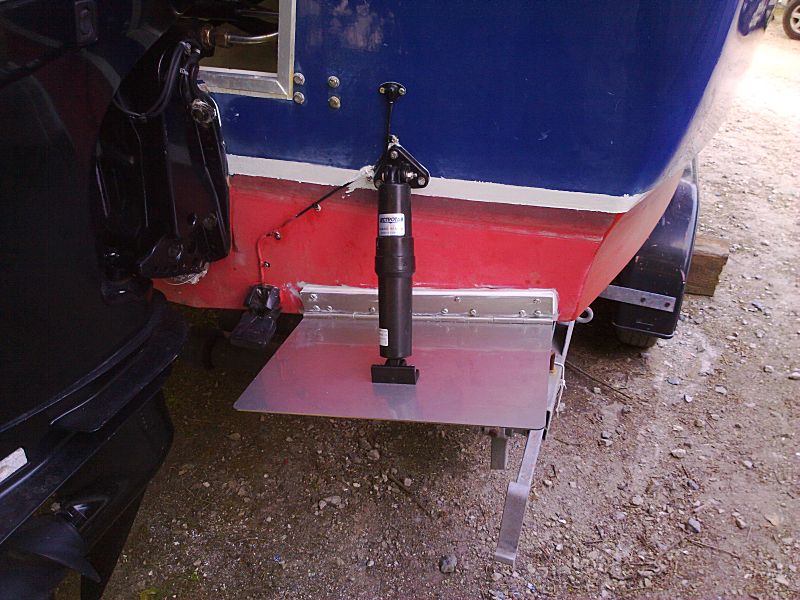
Trim tab assembled with actuator (ram) in place, and control wire
routed into the hull
(the wire above the actuator is the
re-routed transducer cable)
Prior to antifouling, the whole trim tab assembly needs to be primed. Ensure the ram is fully retracted before painting!
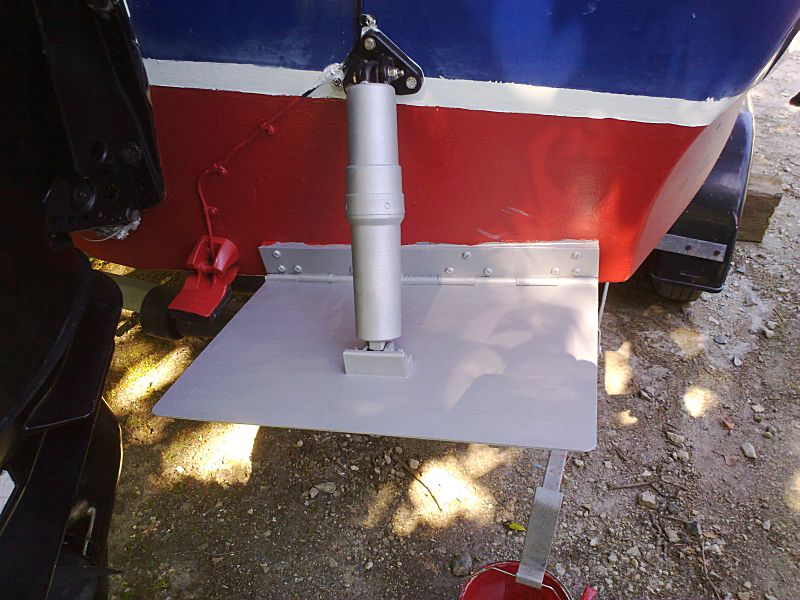
The whole was then fully primed prior to antifouling
To be closely followed by the delightful antifouling. But it looks a little prettier!
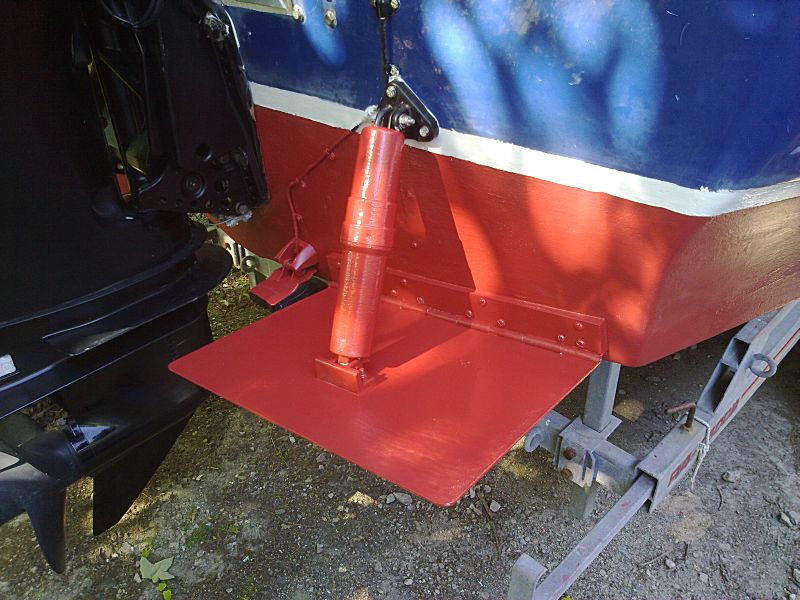
The complete, primed and antifouled trim tab
And all looks neat and proper!
The finished Lectrotab Trim Tabs prior to launch – the transducer
had to move over though
The following two photos show the trim tabs after a season afloat, and help demonstrate the full effect that trim tabs can have in terms of presenting an "aileron" control surface to the water underneath the hull in lifting the stern, and in turn effectively bringing the bow angle down, and in assisting the hull up onto the plane.

The trim tabs in the "home" or up position
Trim tabs fully deployed... though never leave trim tabs in the water like this - always ensure that they are returned to the home (closed) position when back in port or on the mooring. The last thing you want is marine growth on the extended ram, and risking wrecking the internal seals (even if it is stated they can cope with expelling some amount of growth)!
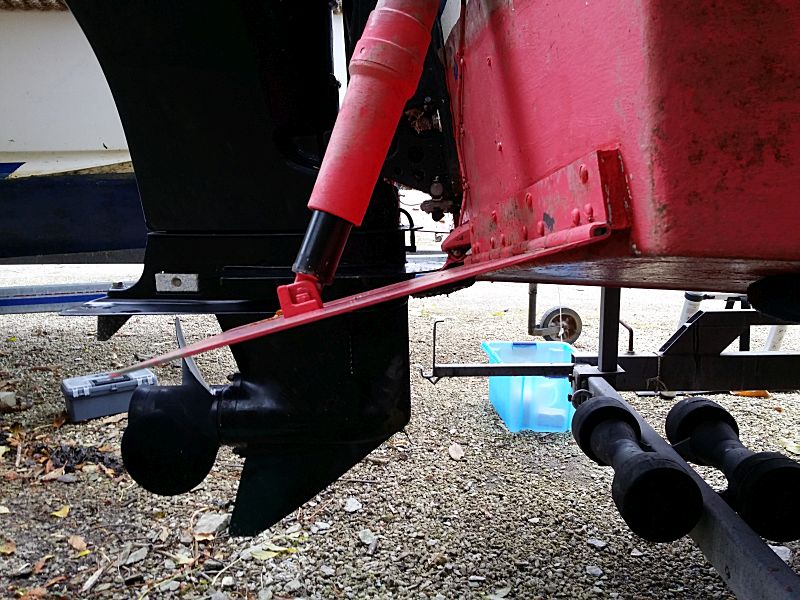
The Trim Tabs in the maximum down position – a significant effect!
With the trim tab plates and rams all fitted, all that is left is to take the actuator cables and battery supply to the control unit mounted in the cockpit. We used the Lectrotabs “Oval” Control, with LEDs showing tab position on each side, and I mounted our unit and power switch just forward of the main engine throttle control, in a custom-fit marine ply box. Make sure you use all the correct wire AWG thicknesses, and wire the controls in accordance with all instructions. The power switching is especially important to ensure correct operation of the automatic retraction on switch-off. The small "breather tubes" contained within each actuator cable must also be routed without kinking, and terminated open and dry.

The Lectrotabs "Oval" Control and power switch ready for
installation in its custom marine ply box.
The choice of mounting position will vary with wheelhouse and helm configuration. We chose to install the control box just forward of the engine control, on the side shelf with easy access for cable and power routing, and access to the electrics behind the main wheelhouse control panel for wiring the automatic retraction facility. This position also gives good visibility of the tab position LEDs in use, and the control is within easy reach to operate.
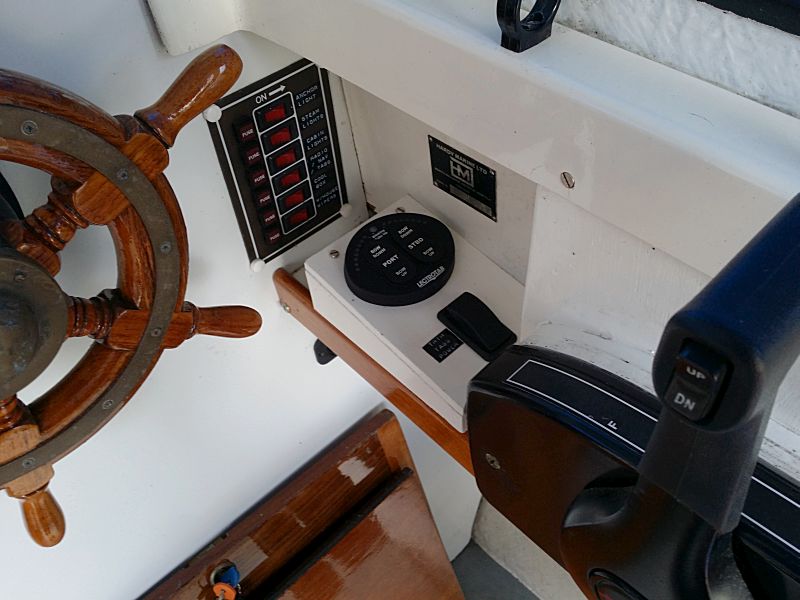
The "Oval" Control and its box installed on Adele just forward of
the engine control unit.
The results so far have been excellent, the ride is more comfortable, and even with the trim tabs only partly deployed, the bow is down significantly at slower displacement speeds. With a 3 x 13.75” x 13” propeller, two crew aboard and fairly full fuel tanks, Adele will now start to achieve planing speeds at around 13kn with tabs fully deployed, before retracting them. I’m hoping to get better performance and fuel consumption figures during 2016, with some better sea conditions and set measurement criteria. Approximate displacement fuel figures have indicated an average of around 2.5litres/hr at 5kn.
For further details of modifications carried
out to Hardy Family Pilot Adele,
see
Modifications (sea
toilet, battery management & hatch), or
Making a New
Wooden Navigation Mast
or go back to the
Adele main page,
or Adele 2021 as
she was when we sold her.
See Adele out on the water on Motor Boating in Fowey
![]()
Connect with us, Like us and Follow us on Facebook!
PhotoFile Cornwall supports CoaST and Sustainable Tourism